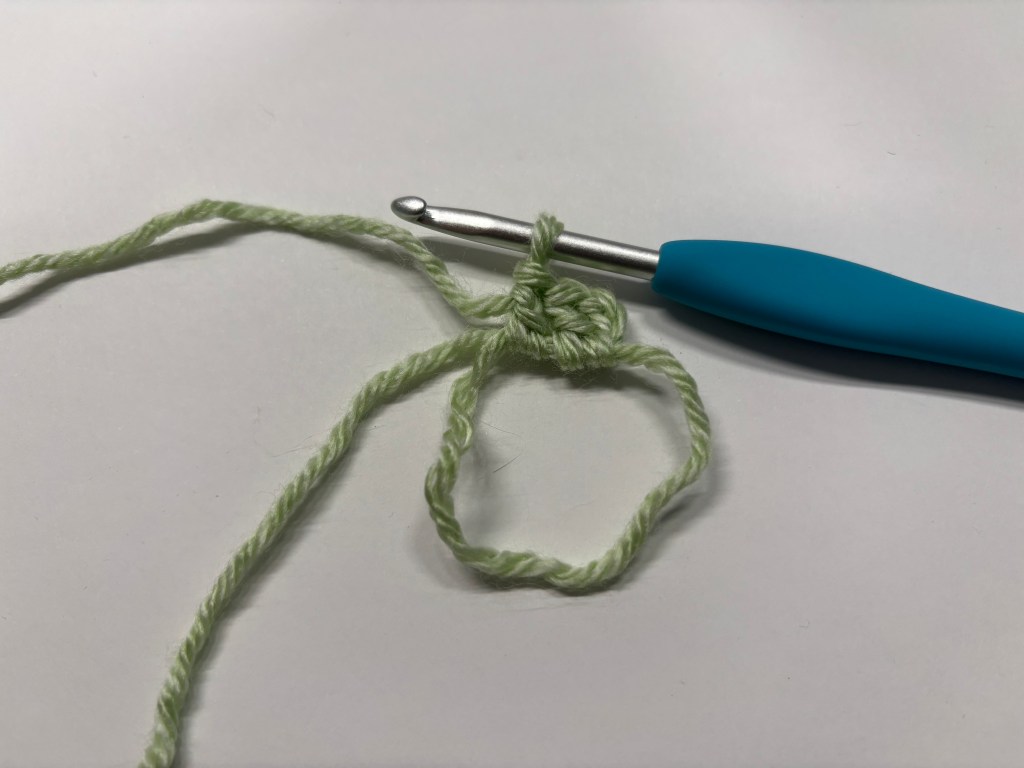
Granny Squares are a staple building block in crochet – they can be used to make blankets, clothing, bags, hats, and much more. The granny square is crocheted in the round, meaning it will start with a magic circle. If you haven’t learned how to do a magic circle yet, check my tutorial here.
Granny squares are completely customizable when it comes to the colors and size of the square. The best part of them is that they follow a repeatable pattern, so adding rows is super easy and once you get the hang of it, it will become second nature (。•̀ᴗ-)✧

In this tutorial, I will show you how to make the first 4 rounds of a granny square, but I will also explain how you can follow the pattern to add more rounds !!
૮( •̀ Ⱉ •́ )ა .ᐟ.ᐟ Important Notes!
- Skill level: Beginner – magic circle, double crochets, chains, slip stitches
- Yarn choice: Any kind, depends on what you plan to use the squares for
- Size: This finished granny square is about 4×4 inches or 10×10 cm, but you can continue the pattern to make as many rows as you want!
- Stitch Count: The 3 chains at the beginning of each row counts as a dc
(๑•ᴗ•๑)✂— Materials Needed:
- Size 4 yarn in any color(s)
- 4.5mm crochet hook
- (yarn/hook size can changed depending on project, I am just listing what I used)
- Darning needle
- Scissors
- Stitch markers (optional)
(╭ರ_•́)ა .ᐣ.ᐣ Abbreviations to know (US):
- mc – Magic circle
- sl knt – Slip knot
- ch – Chain
- sl st – Slip stitch
- dc – Double crochet
- st(s) – Stitch(es)
- () – indicates everything in the parenthesis will be repeated x number of times
- [] – indicates everything in brackets will be done into the same ch 2 area
(•̀ᴗ•́)و✎… Instructions:
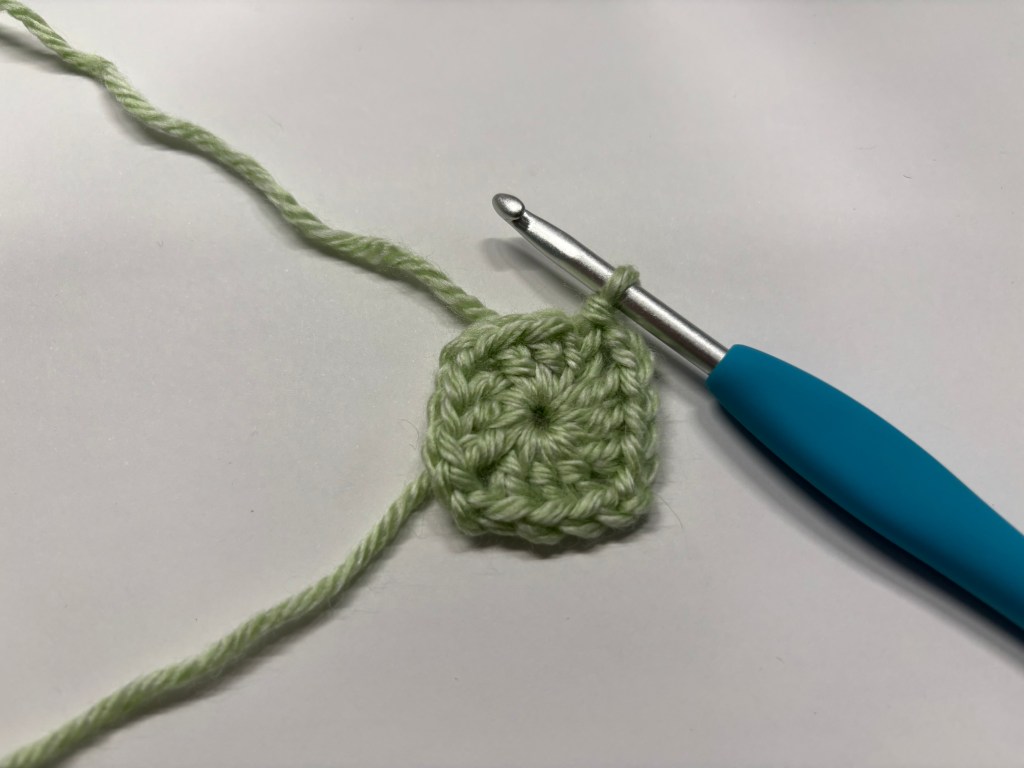
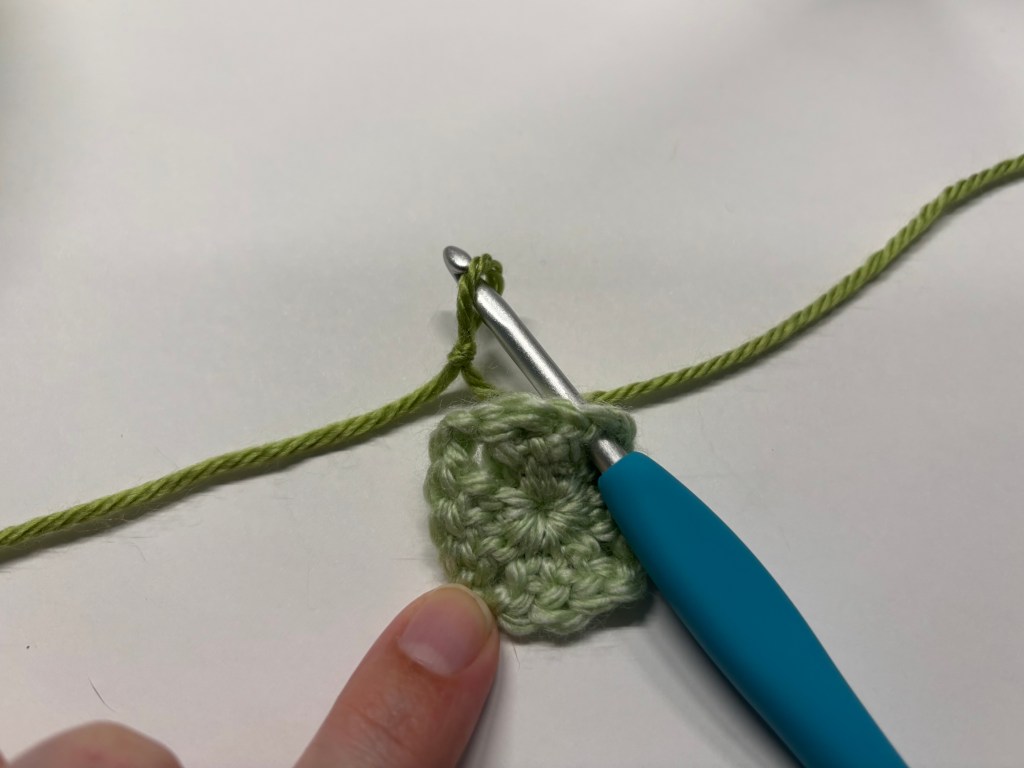
Round 1: mc, ch 3, dc 2, ch 2, ( dc 3, ch 2 ) x 3,
sl st into the top of the beginning ch 3 to join. pull the magic circle tail to tighten, cut and weave ends (you can weave your ends at the very end of your square or project, but I find it easier to do so after every round).
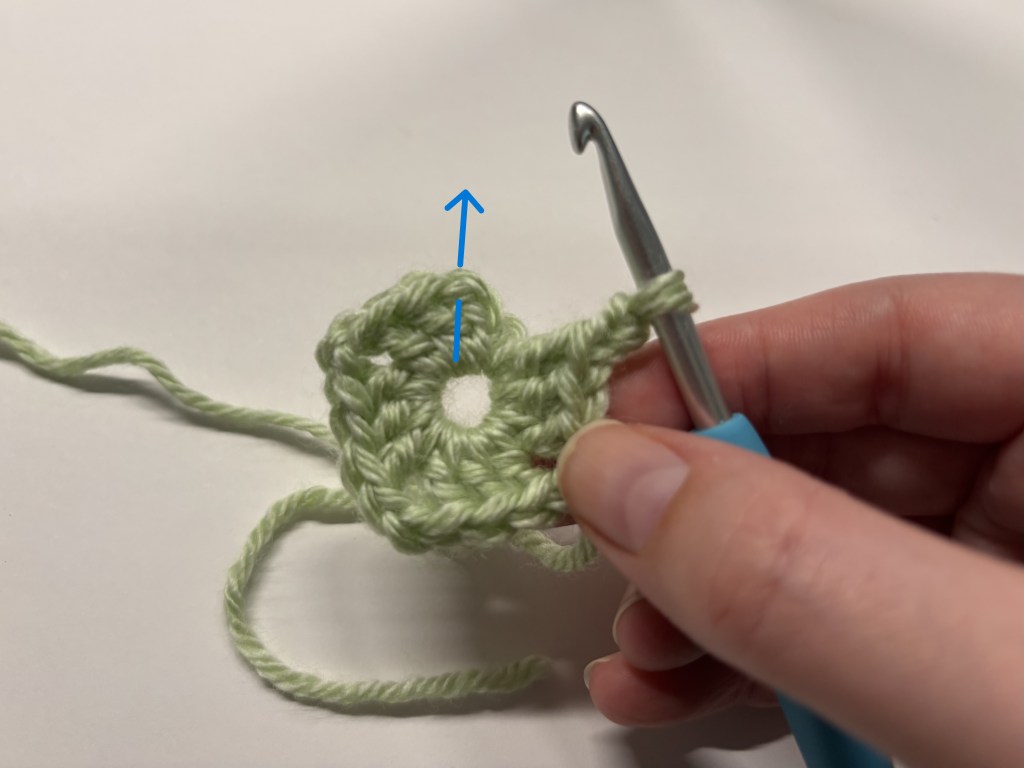
| mc, ch 3 and dc 2 | finished last dc 3 and ch 2, then sl st here |
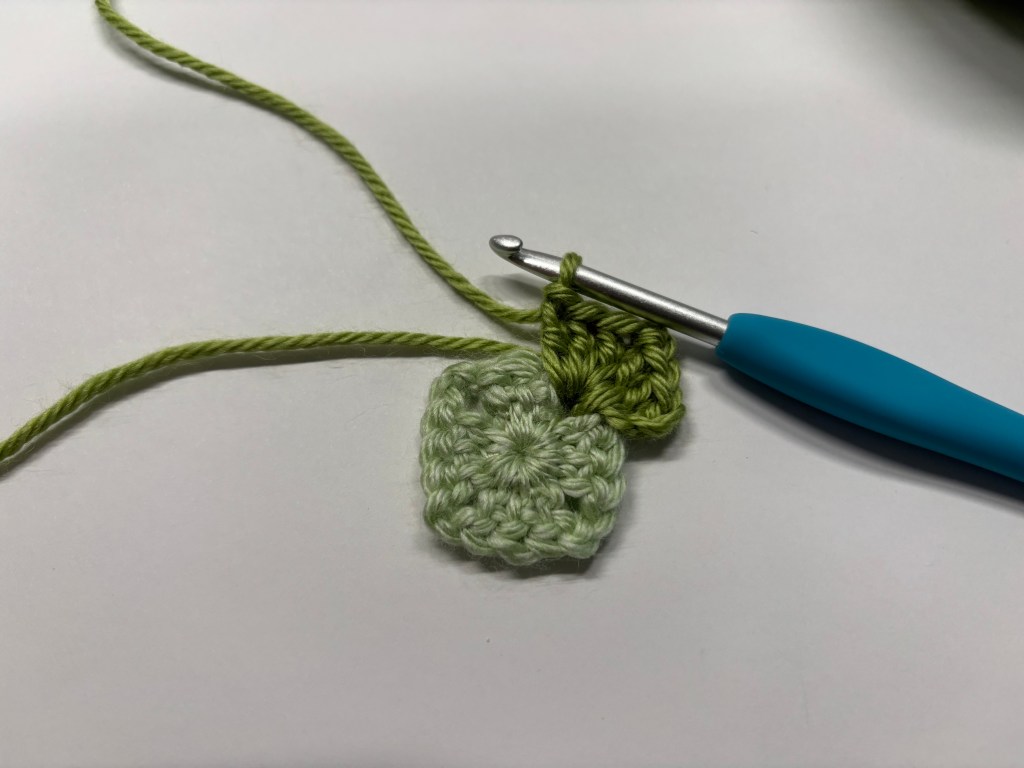
Round 2: turn your work over so that you are now looking at the back of the square. place your hook through one of the ch 2 corners and make a sl knt on your hook with a new color. pull the loop back through the corner to attach the new color, then begin:
[ ch 3, dc 2, ch 2, dc 3 ] into the ch 2 corner space, ch 1,
( [ dc 3, ch 2, dc 3 ] into the ch 2 corner space, ch 1 ) x 3,
sl st into the top of the beginning ch 3 to join. cut and weave ends.
* Here, the highlighted brackets indicate the corners. For each of the four corners, all of the stitches in brackets will be done within the same ch 2 space we created in round 1. After you finish the corner, you will create a ch 1 space to get to the next corner.

| place hook through a corner and make a sl knt | pull sl knt loop through corner. begin ch 3 here |

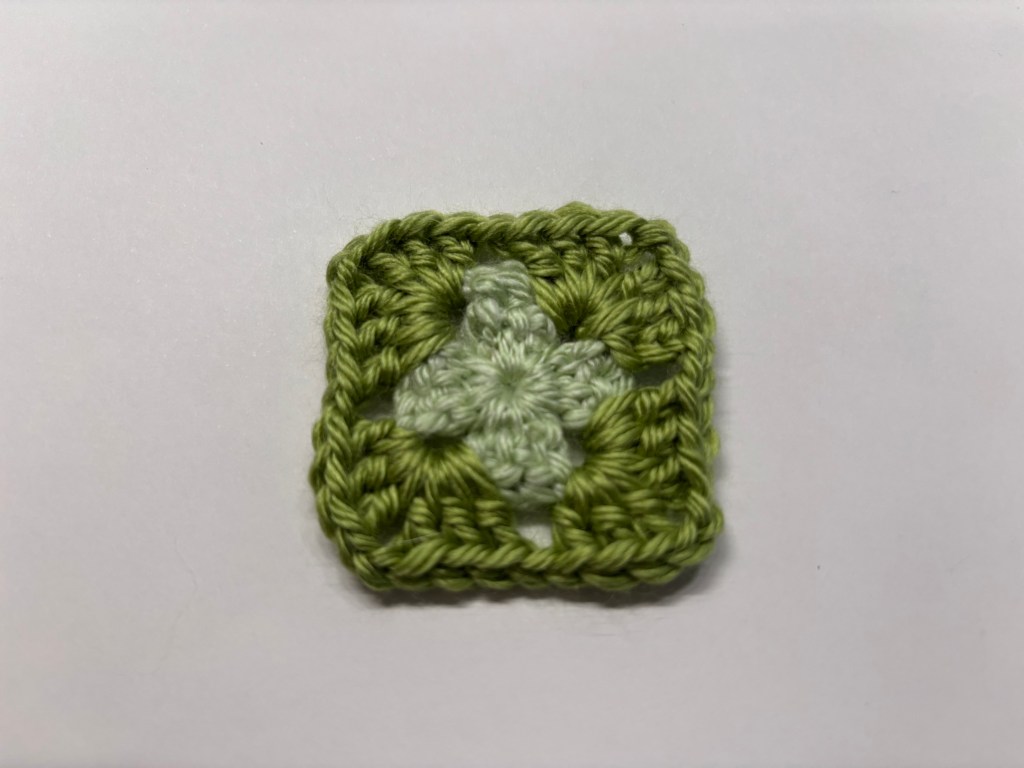
Round 3: turn work, attach new color, then begin:
[ ch 3, dc 2, ch 2, dc 3 ] into the ch 2 corner space, ch 1, [ dc 3 ] into the ch 1 space, ch 1,
( [ dc 3, ch 2, dc 3 ] into the ch 2 corner space, ch 1, [ dc 3 ] into the ch 1 space, ch 1 ) x 3,
sl st into the top of the beginning ch 3 to join. cut and weave ends.
* Here, I have also highlighted the dc 3 cluster in yellow. Now after each corner, instead of going right into another corner, we must place one dc 3 cluster in the ch 1 space we created between each corner in round 2.


| first corner and dc 3 cluster finished | sl st to top of beginning ch 3 to join |
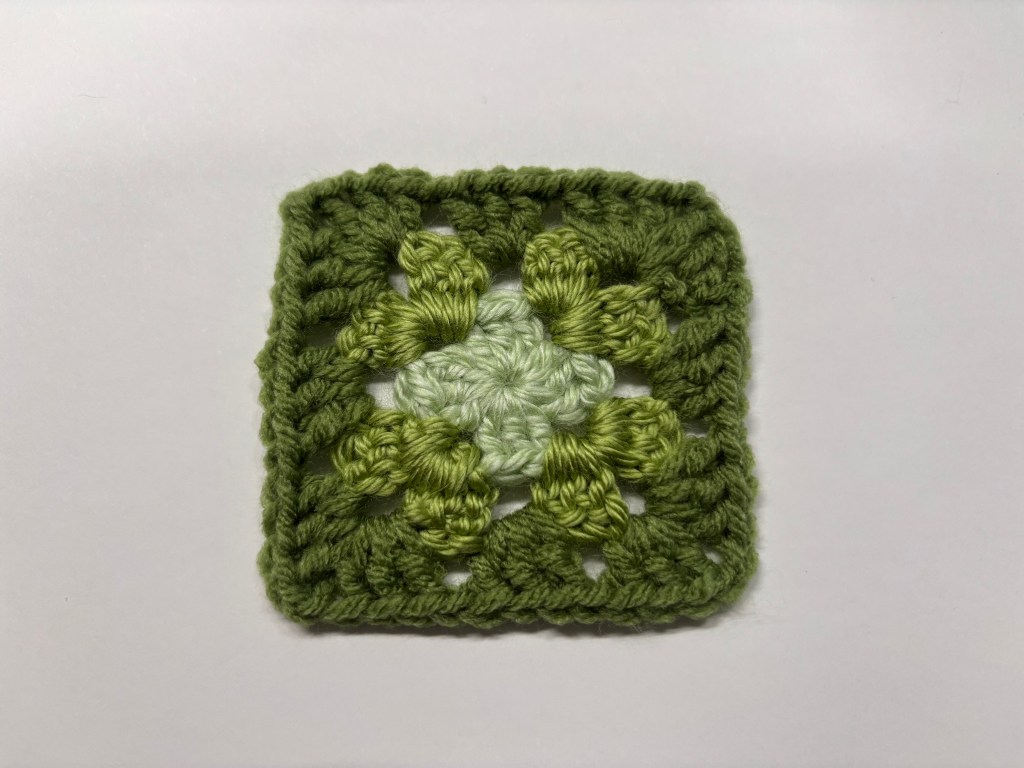
Round 4: turn work, attach new color, then begin:
[ ch 3, dc 2, ch 2, dc 3 ] into the ch 2 corner space, ch 1,
( [ dc 3 ] into the ch 1 space, ch 1 ) x 2,
( [ dc 3, ch 2, dc 3 ] into the ch 2 corner space, ch 1, ( [ dc 3 ] into the ch 1 space ) x 2 ) x 3,
sl st into the top of the beginning ch 3 to join. cut and weave ends.
* Have you started to notice the pattern yet? Corners will always have two dc 3 clusters and a ch 2 between them. When you are crocheting a dc 3 cluster on the edge of the square, they will always have a ch 1 between them.
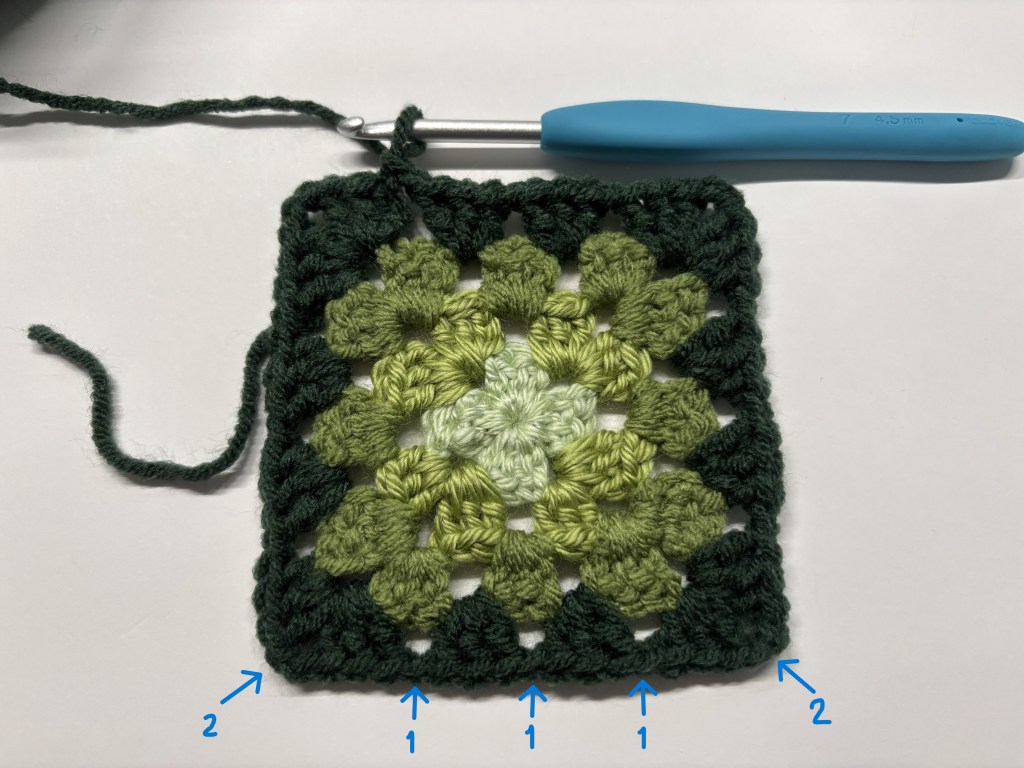
✧。٩(ˊᗜˋ )و✧*。 And now the square is complete!! Or, you can keep going in this pattern to make a bigger square depending on what you want to make with your squares.
To continue this pattern for more rounds on the granny square, you’ll add one more ( [ dc 3 ], into the ch 1 space, ch1 ) on each edge of the square each time you increase a round.
For example, Round 5 would be:
[ ch 3, dc 2, ch 2, dc 3 ] into the ch 2 corner space, ch 1,
( [ dc 3 ] into the ch 1 space, ch 1 ) x 3,
( [ dc 3, ch 2, dc 3 ] into the ch 2 corner space, ch 1, ( [ dc 3 ] into the ch 1 space, ch 1 ) x 3 ) x 3,
sl st into the top of the beginning ch 3 to join. cut and weave ends.
Round 6 would be ( [ dc 3 ] into the ch 1 space, ch 1 ) x 4 and so on.
Let me know what you’re going to make with granny squares in the comments below!

Leave a comment